
Ignition HMI
Rapidly build an HMI for your PLC Shift apps using Inductive Automation's Ignition SCADA software. This HMI can be put together in a few minutes, and is useful for quickly getting started with PLC Shift. It allows you to view and write tag values and gain a better understanding of how PLC Shift apps work. It leverages an automated export from PLC Shift Manager that allows you importhundreds of properly configured tags into Ignition in seconds.
This feature is released in version 1.45, in August of 2024. At this time, only the Modbus protocol is supported, but we intend to add OPC UA soon.
Only the Modbus protocol is supported in PLC Shift version 1.45.
|
The HMI uses a Power Table object to display a data set. The underlying data set is generated via a script and relies on the tags for an app being in the same folder. Tag writes are made possible through a script that is called when the first column in a row is right clicked.

Single App HMI in Ignition
Follow the instructions below to rapidly create an HMI in Ignition.
-
In Ignition, set up a Modbus server using the Config->OPC-UA->Device Connections option while connected to the gateway using a browser. The default settings with respect byte and word ordering match the defaults in PLC Shift, so no changes need to be made here. Ignition's Modbus driver is very aggressive when it comes to register spanning, however, and we have seen cases where turning the 'Span Gaps' option off is necessary for stable communications. The Sensa HCC2 in particular benefits from having this setting disabled.
 Modbus Server Configuration in Ignition
 -
Generate an Ignition export using the File->Export->Inductive Automation option in PLC Shift Manager. This option is only enabled when you have a device selected in the tree view. As of PLC Shift Manager version 1.45 (August 2024), only 'Modbus' is supported in the 'Protocol Option' field. Choosing another option here will result in an error. This will create a JSON file that contains tag definitions. Each tag will have a Modbus address configured.
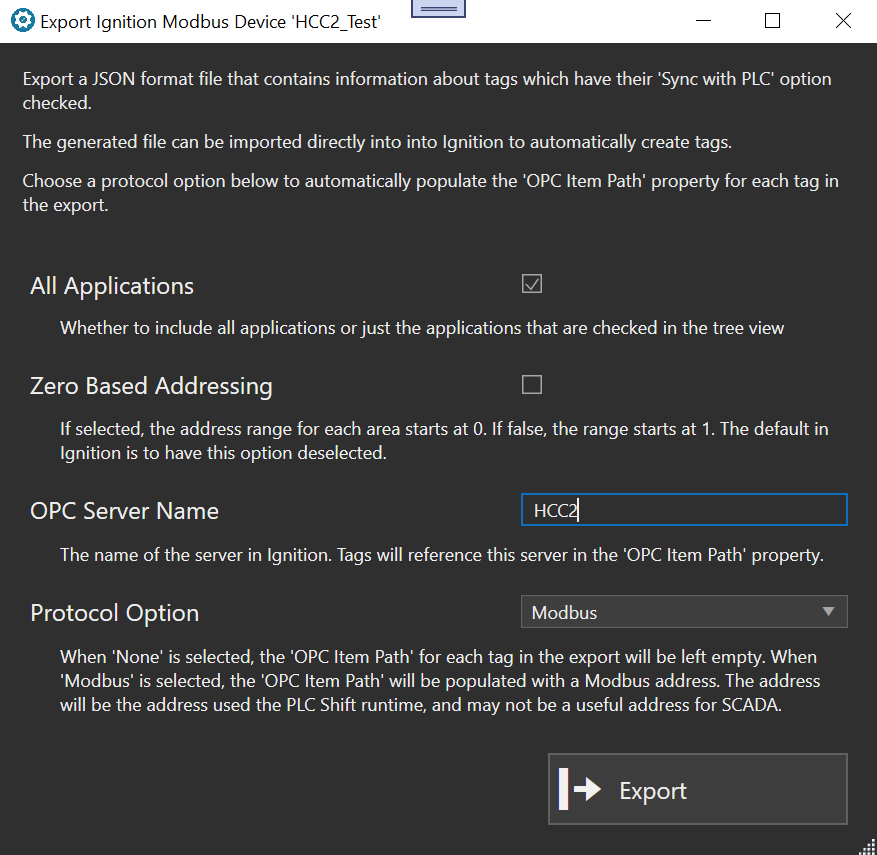 Ignition Export Options in PLC Shift Manager
 -
Import the JSON file into the tag browser Ignition Designer. Tags for each app will be grouped into their own folder, and all app folders will be created under a top level folder called 'PLC Shift'. The script that generates the data set relies on this specific hierarchy.
 Ignition Tag Import
 -
Copy the code below and create a script with global scope. I have created the script under a script package called 'Tables'.
-
In Ignition Designer, create a new window object and give it the name of one of the apps in your system.
-
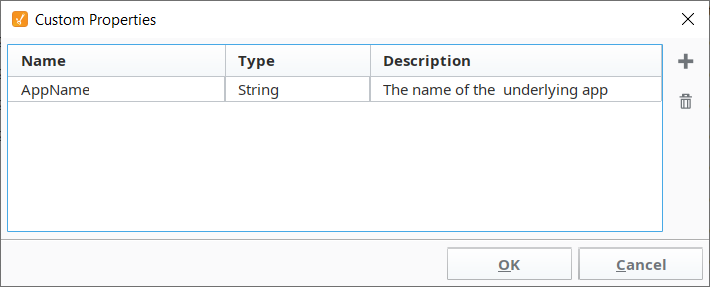
Add a custom property called 'AppName' on the Window that is a string value. Set the value to the name of the app.
-
Create a Power Table object on this new window.
-
Select the Power Table object and then in the Property Editor find the 'Data' section and click the link next to it.
 Property Editor for Power Table Object
 -
In the Expression editor, add an expression to call the GetData script with the app name. The example shows that the script is called every 2500 ms.
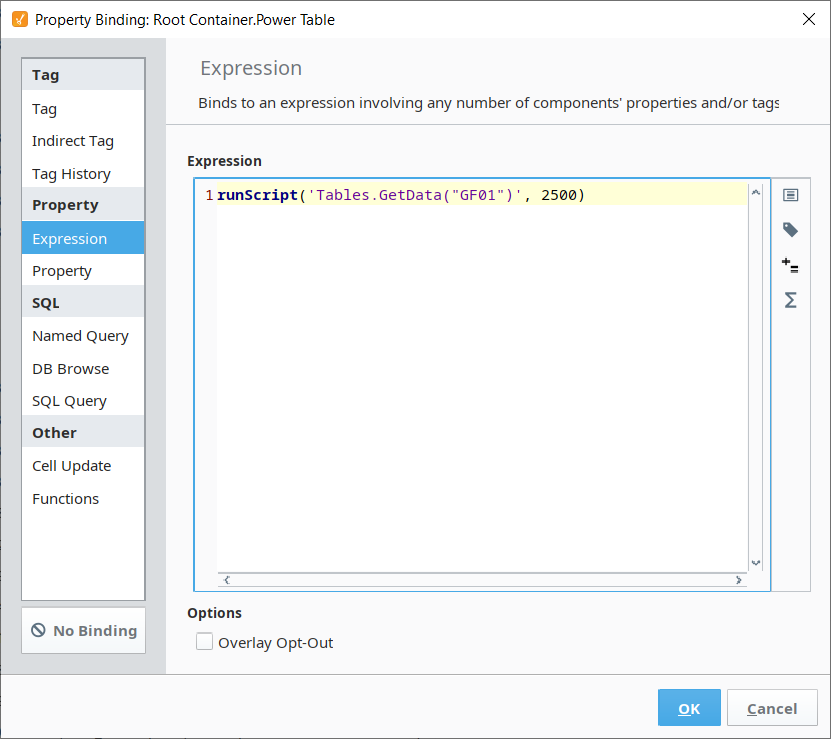 Execute the GetData Script Periodically
 -
Build a GUI to write values.
-
Add a Label object and set the text value to 'Selected Tag Name'
-
Add a Text Field object. We will bind the value of this object to the first column of the selected row in the data set. Name this object 'LabelSelectedTagName'.
-
Add a Label object and set the text value to 'New Value'.
-
Add a Numeric Text Field object.
-
Add a Button object and set the text to 'Update Value'.
-
Right click the button object, choose the 'Scripting' option, and enter the script below on the button. This sets the value on selected tag to the value in the numeric text field object.
 GUI Elements to Update a Tag Value
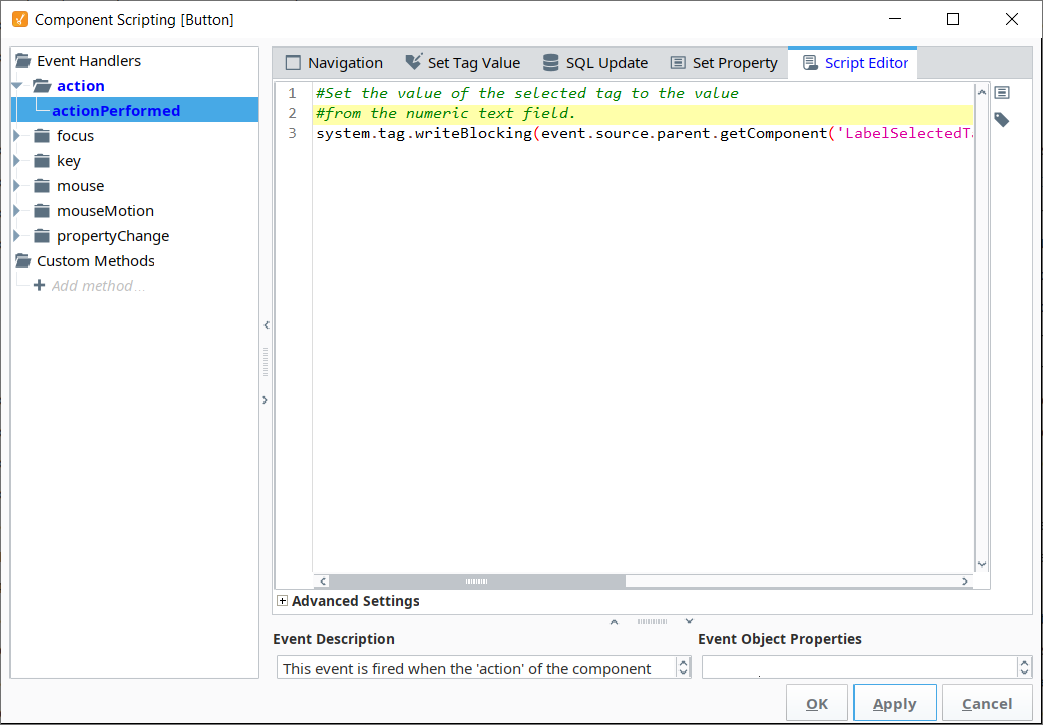 Button Script
 -
Right click the Power Table object and choose the 'Scripting' option. Enter the script below on the 'onPopupTrigger' event. This script populates the selected tag object and enables the button if the underlying tag is writeable.Put the system into run mode and test it out. The Power Table will show all tag values for the app. Right click on the Tag Name column in the table, enter a new value, and then click the 'Update' button to write a new value to the RTU over Modbus. The Automated export from PLC Shift Manger into Ignition allows you to create hundreds of correctly configured tags in seconds.