Sensia HCC2
Users have no root (superuser) access on the Sensia HCC2 and SSH is disabled. The HCC2 can run user programs via Docker containers that are converted to mender.io files and then digitally signed. The digital signature on the mender file must be verified before the container can be loaded onto the HCC2.
Reverity provides a container that has the PLC Shift runtime and plugins already installed on it and that is digitally signed. See the Quick Start guide for details on how to deploy the PLC Shift runtime to a Sensia HCC2 device.
Modbus
The PLC Shift runtime connects to the HCC2 using the Modbus TCP protocol. PLC Shift Manager has an export specific to the HCC2's Modbus map editor that allows you to quickly import tags and registers for multiple apps.
Follow the instructions below to import Modbus tags into the HCC2.
-
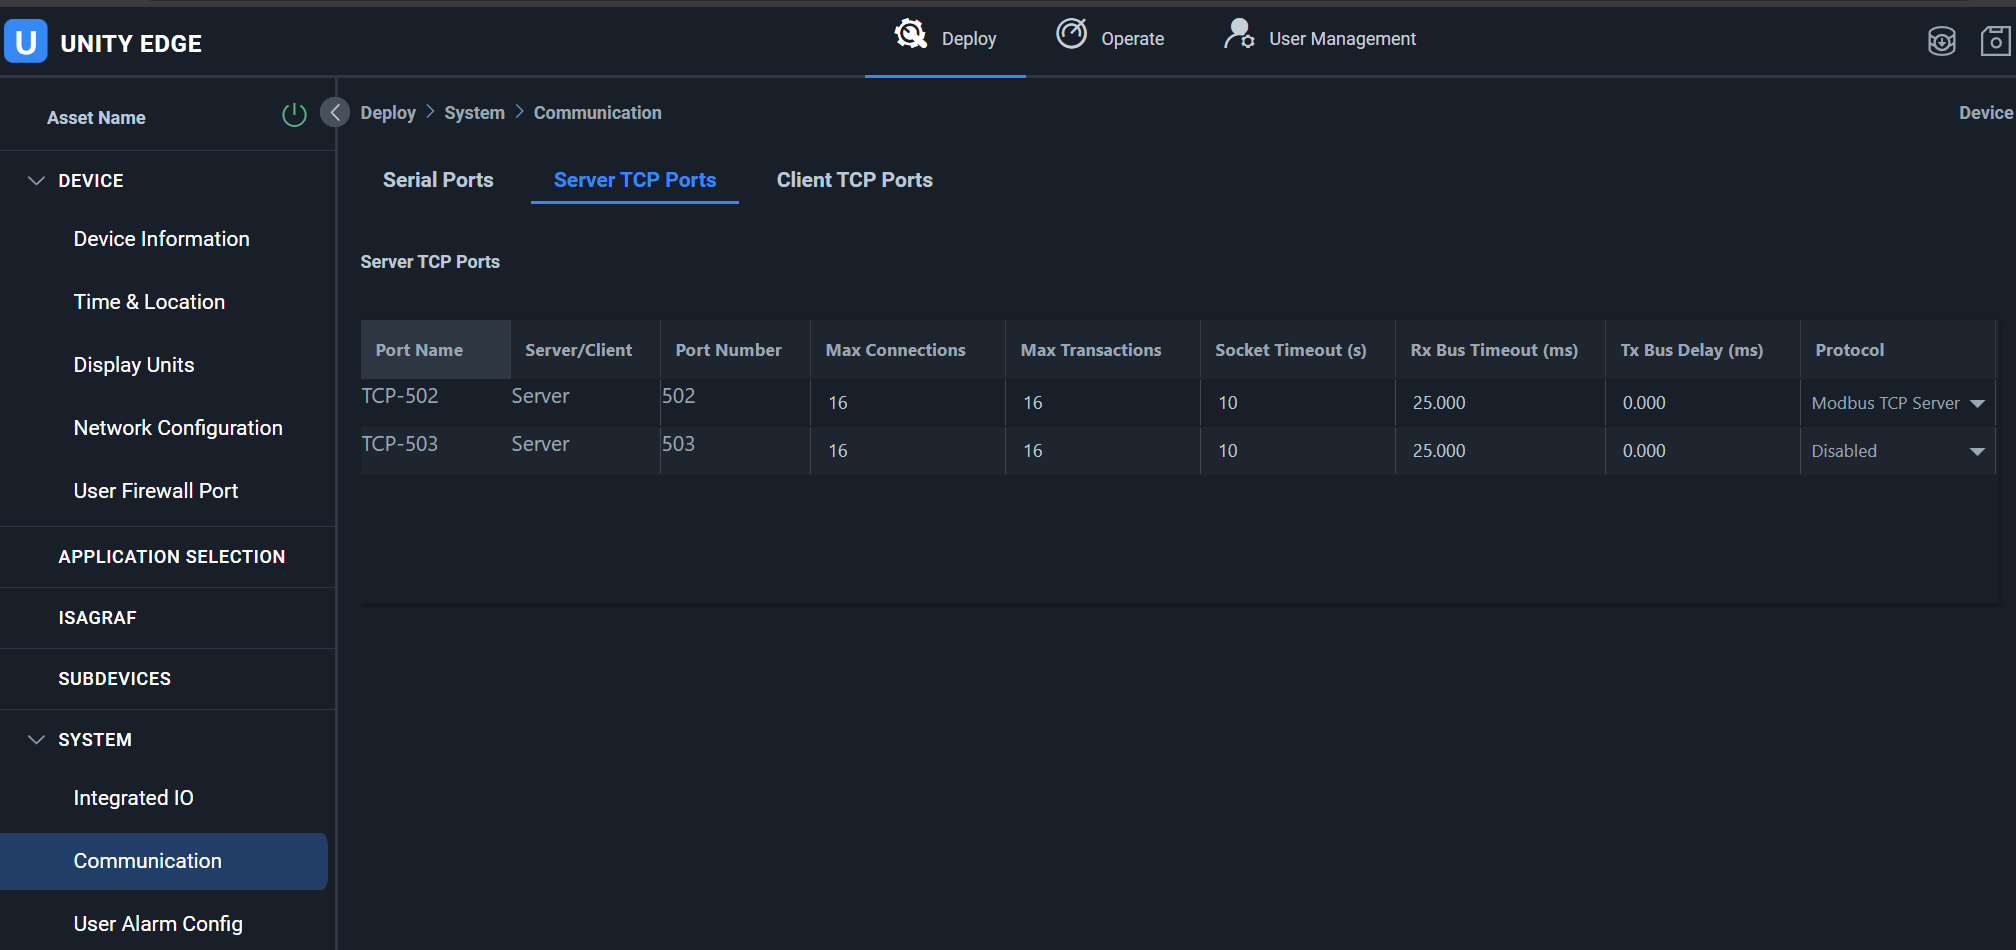
In Unity Edge, in the Deploy->System->Communication menu, enable one of the Modbus TCP servers. Note which server you have enabled and which port it is using. Internal to the HCC2, port 502 is mapped to port 25002 and port 503 is mapped to port 25003. The value that you enter in device's configuration in PLC Shift Manager is the internal port number.

Unity Edge - Enable Modbus TCP Server
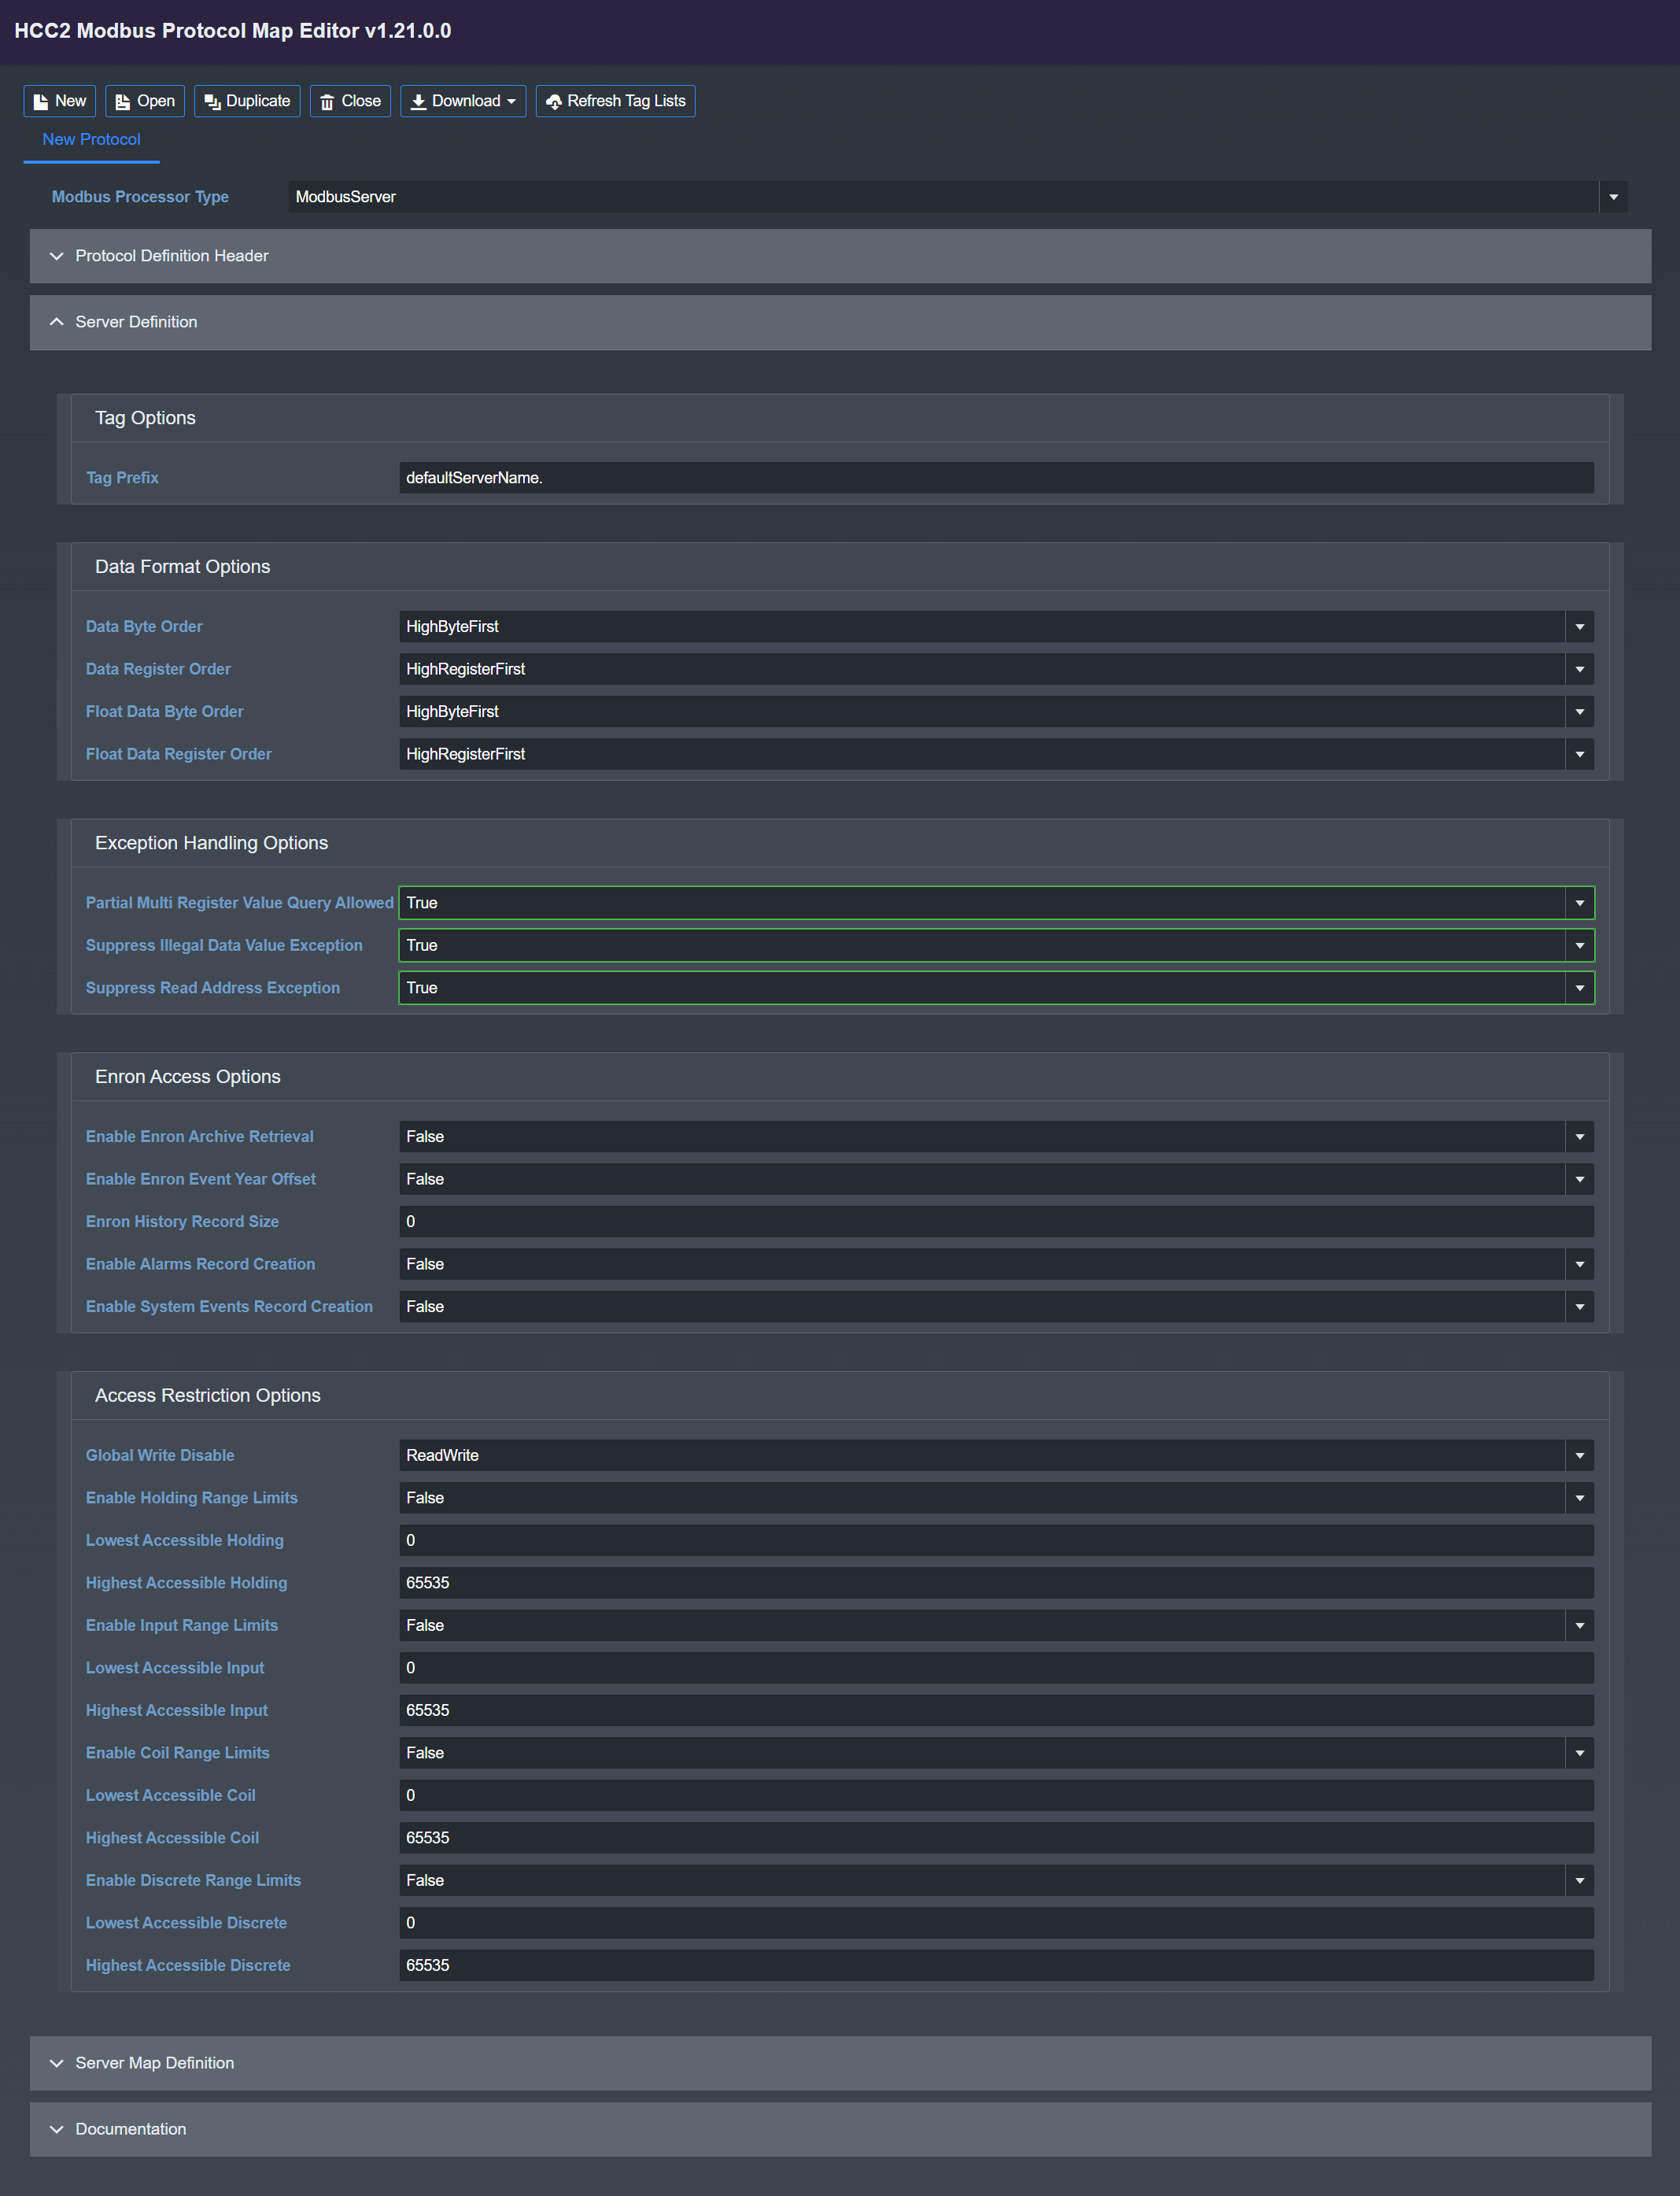
2. Open the Modbus map editor and configure the 'Protocol Definition Header' and 'Server Definition' sections. The header section is purely for documentation and has no effect on operation. In the 'Server Definition' section, the default data format options (byte and register ordering) match the defaults in PLC Shift, so no changes are necessary.
We recommend changing the all of the settings in the 'Exception Handling Options' to 'True'. This reduces Modbus exceptions as the system is being set up. No other changes are required.

Modbus Server Definition
3. Download the configuration in .CSV format. This gives a file with the server configuration but with no tags in it.

HCC2 Modbus Protocol Definition with no Tags
4. In PLC Shift Manager, configure a device and apps. See the Quick Start guide for more details. Choose which app tags that you would like to synchronize with the HCC2. Change the base Modbus address for each app so that there are no overlaps. This isn't necessary if you only have one app.
When you have a configuration that you like, choose the File->Export->Sensia HCC2 from the top menu. This option is only selectable when you have a device selected in the tree view. This allows for cross validation of all Modbus registers for all apps.
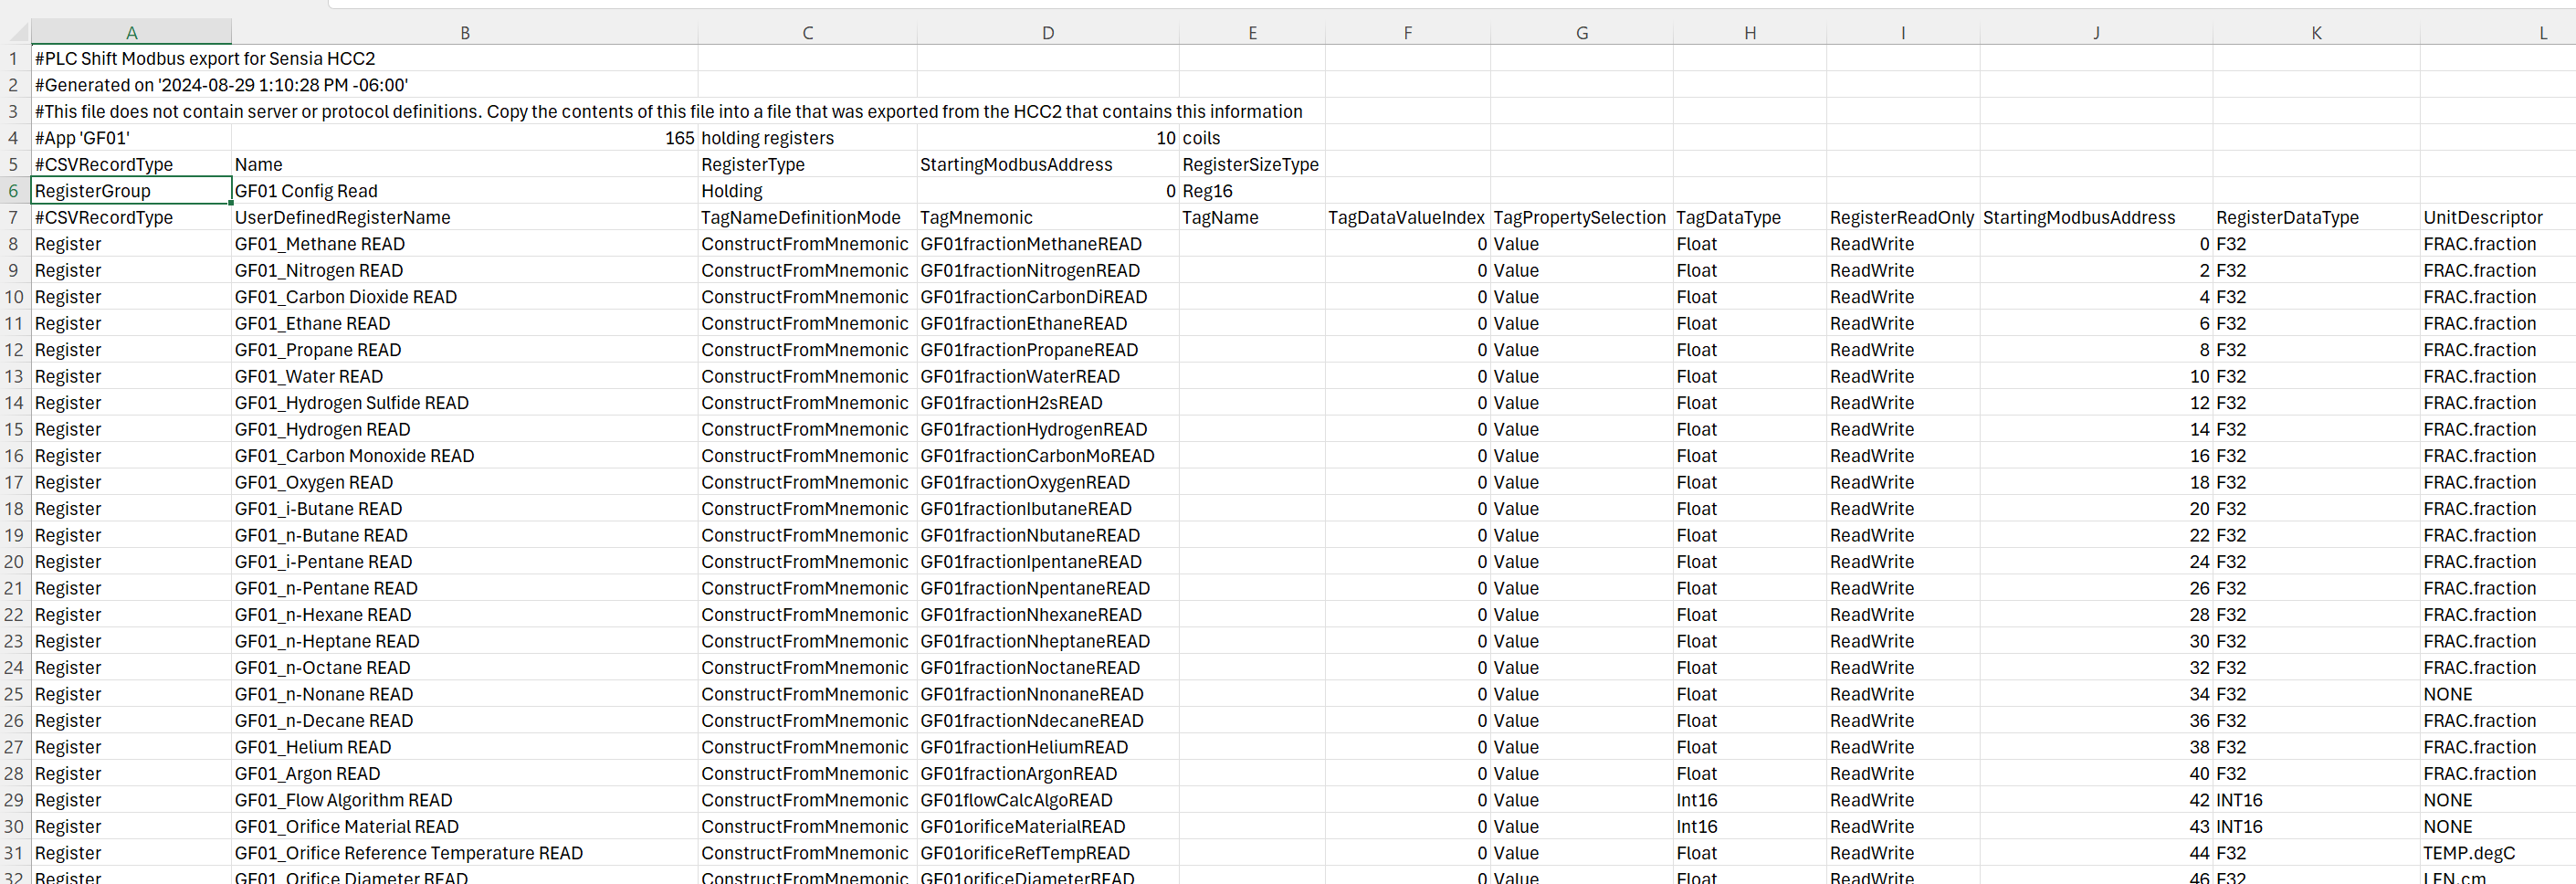
5. Open the generated file. If there are any errors, fix the errors and then reexport. Select the tags and paste them into the previously exported file. Lines starting with the '#' character are comments and can be copied into the template file without issues.

Export from PLC Shift Manager in HCC2 Modbus Protocol Definition Format
6. Import the file back into the HCC2 Modbus map editor. The header and server configuration sections will be preserved from the previous export, and the tags from the PLC Shift export file will also be created.
7. Optionally link the tags/registers in the protocol definition to IO tags, Isagraf tags, or other tag producers and consumers. See the HCC2 documentation on how to do this.
8. From here, the protocol definition can be treated like one that is created manually. Refer to Sensia documentation for the details on how to use this file. A quick summary is that the definition should be downloaded and saved in the .pdef format. Then, on the Modbus configuration screen in Unity Edge, the file can be uploaded to the enabled Modbus TCP server. The final step is to deploy the new configuration.
The HCC2 is now configured and tags are mapped to Modbus registers. Apps can be deployed and the PLC Shift runtime will read and write the appropriate registers.
